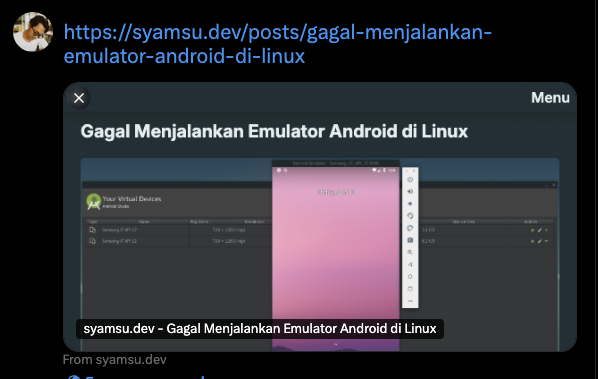
I was implementing meta tags for twitter summary large card. Creating the images and cropping them manually would be time consuming for every blog post. In this post, I'll show you how I automated this process using Playwright - typically an end-to-end testing tool - to programmatically generate consistent social media preview images.
So, I thought I would automate this using end-to-end testing tool, Playwright. I knew I read this in Playwright documentation that it is able to take screenshots, and I was right. Playwright claims to be a reliable end-to-end testing. And I can vouch for that it is snappier runtime compared to Cypress. At least, that is what I experience from using them both. Although maybe Cypress has already improved so much after the last time I used it 3 years ago.
Installation
Setting up Playwright is easy using npm, yarn, or pnpm.
1# if you use npm2npm init playwright@latest3# if you use pnpm4pnpm create playwrightFollow the prompts to create several options, i.e., directory name, GitHub Actions workflow, and their browsers. This will create following files for you to get started
1playwright.config.ts2package.json3package-lock.json4tests/5 example.spec.ts6tests-examples/7 demo-todo-app.spec.tsSetting up Playwright
playwright.config.ts is the entry point in which Playwright setup everything before running your tests. It is a good thing that this file includes comments as its config documentation. For me, I only changed the base url and device I would use.
1export default defineConfig({2 testDir: './tests',3 /* Run tests in files in parallel */4 fullyParallel: true,5 /* Fail the build on CI if you accidentally left test.only in the source code. */6 forbidOnly: !!process.env.CI,7 /* Retry on CI only */8 retries: process.env.CI ? 2 : 0,9 /* Opt out of parallel tests on CI. */10 workers: process.env.CI ? 1 : undefined,11 /* Reporter to use. See https://playwright.dev/docs/test-reporters */12 reporter: 'html',13 /* Shared settings for all the projects below. See https://playwright.dev/docs/api/class-testoptions. */14 use: {15 /* Base URL to use in actions like `await page.goto('/')`. */16 baseURL: 'http://localhost:5173',17 /* Collect trace when retrying the failed test. See https://playwright.dev/docs/trace-viewer */18 trace: 'on-first-retry',19 },20 projects: [21 {22 name: 'chromium',23 use: {24 ...devices['Desktop Chrome'],25 // roughly iPhone 14 Pro Max26 viewport: { width: 600, height: 1000 },27 },28 },29 ],30});Configuration Explained
The key parts of my Playwright configuration:
baseURL: Points to my local development serverviewport: Set to 600x1000 to match my desired image width- Single browser project using Chromium for consistency
Notice that I set that device's viewport to 600 x 1000, this is because my aim is to create a screenshot of 600px in width. While the height is just so that my CSS' auto margins and auto height does not break the page.
Writing tests
Since I only care about generating screenshots for now. I wrote my tests just to do that.
Taking screenshot of homepage
Below code is how I am taking screenshot of my homepage.
1import { test } from '@playwright/test';2const baseScreenshotDir = 'playwright/screenshots';3test('screenshot homepage', async ({ page }) => {4 await page.goto('/');5 await page.waitForLoadState('domcontentloaded');6 await page.screenshot({7 path: `${baseScreenshotDir}/index.jpeg`,8 quality: 100,9 clip: { x: 0, y: 0, width: 600, height: 300 },10 });11});Notice how I pass the clip arguments, I use 600 and 300 for width and height. This is how I create my meta images 600 x 300 pixels in dimensions. This nice API from Playwright helps me create the screenshots without having to crop them in another process.
Taking screenshots of articles
Taking screenshots of blog posts requires visiting them one by one. Because this is my own blog, I can query my own blog posts internally. And I am iterating over the posts link.
1test(`screenshot posts`, async ({ context }) => {2 const posts = await getPostWithLink();3 for (const post of posts) {4 const page = await context.newPage();5 try {6 await page.goto(`/posts/${post.link}`);7 await page.waitForLoadState('domcontentloaded');8 await page.screenshot({9 path: `${baseScreenshotDir}/${post.link}.jpeg`,10 quality: 100,11 clip: { x: 0, y: 0, width: 600, height: 300 },12 });13 } catch (error) {14 console.error(`Failed to screenshot ${post.link}:`, error);15 } finally {16 await page.close();17 }18 }19});Running the tests
After writing tests, run them with playwright
1npx playwright test2# or pnpm3pnpm exec playwright testBelow is an example of resulting tests

Conclusion
Using Playwright to generate meta image screenshots automates my blog's image creation workflow. The setup was straightforward, and the API is intuitive to use. This solution saves time and ensures consistency across all blog posts.
While this approach might seem unconventional, it demonstrates how testing tools like Playwright can be repurposed for content generation tasks. The ability to precisely control screenshot dimensions and quality makes it a valuable tool for automating image-related workflows.
